Three weeks wrestling with Word formatting for my graduation thesis taught me more about the software than four years of using it. Margins that shift when you add a table, heading styles that break your table of contents, tab stops that refuse to align — if you’re about to write a thesis report, here’s everything I wish I’d set up from day one.
Switch Units from Inches to cm
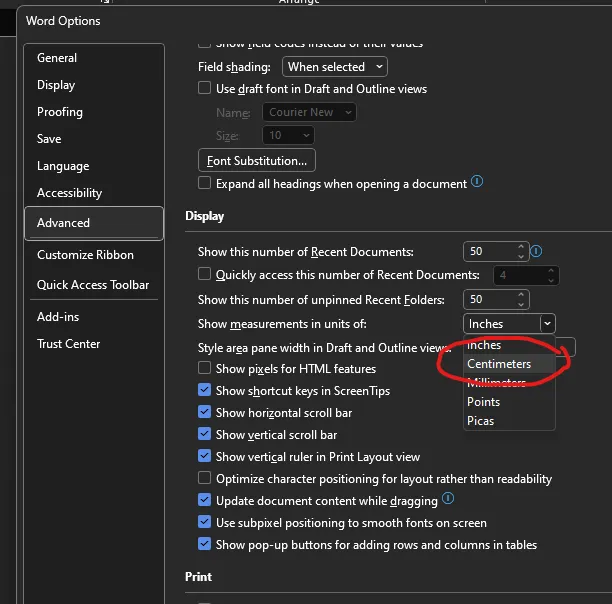
By default, Microsoft Word uses inches, but in Vietnam we use cm. To switch units:
- Go to File -> Options -> Advanced.
- Scroll down to the Display section.
- Select the unit in Show measurements in units of.
- Click OK.
Margin
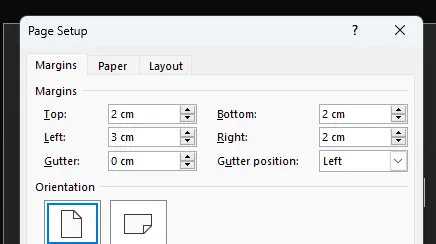
Next, set up margins for the report. Margins are the distance from content to the edge of the paper. At our academy, the required margins are (2cm, 2cm, 2cm, 3cm) (top, right, bottom, left). Margins may vary depending on your institution’s requirements.
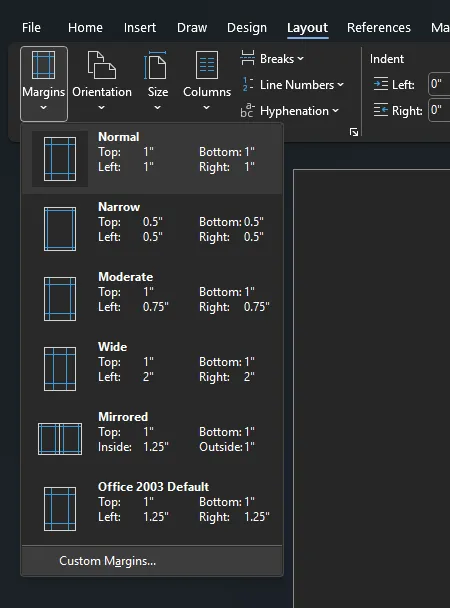
Set margins at Layout -> Margins (left side) -> Custom Margins.

Paragraph
Paragraph is the most commonly used text style in reports. Example requirements from the academy:
- Font size: 14 (pt).
- Font: Times New Roman.
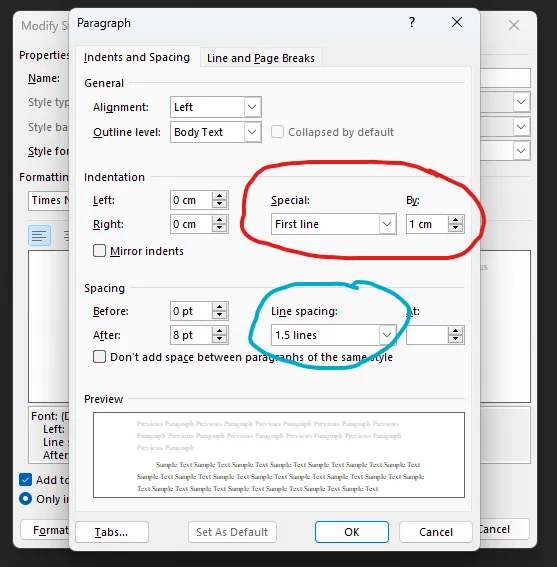
- Line spacing: 1.5 lines.
- First line indent: 1cm.
To apply these settings:
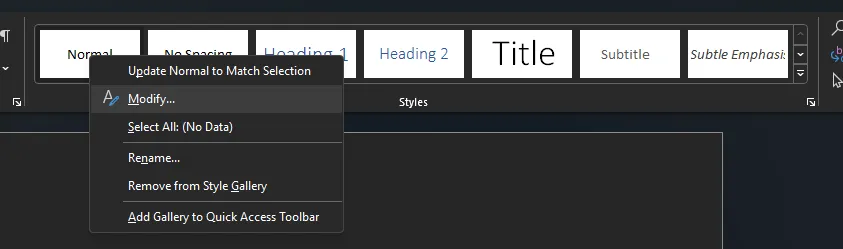
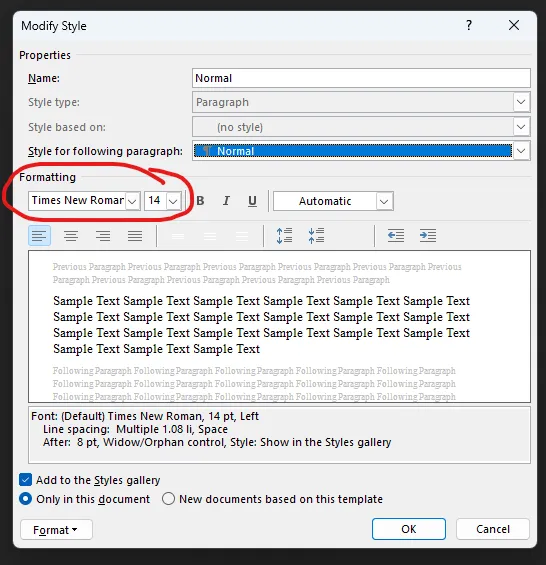
Right-click the Normal style on the Styles bar and select Modify.
A popup appears. Set the font and font size here.
At the Format button (bottom-left corner), select Paragraph to set the first-line indent of 1cm (red circle) and line spacing (blue circle).
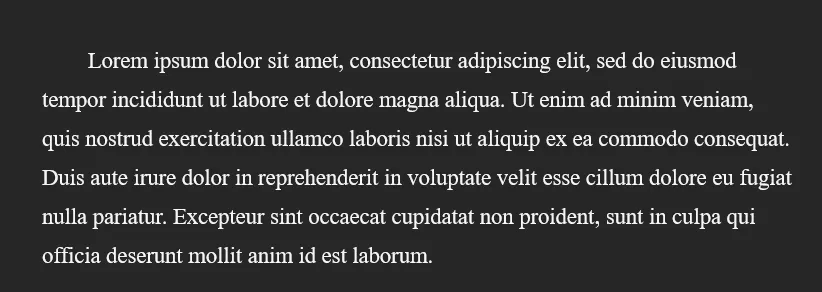
Result:
Heading
Headings are the title bars in the report. Microsoft Word supports Heading 1 through Heading 9. Using headings allows titles to appear in the Navigation Pane.
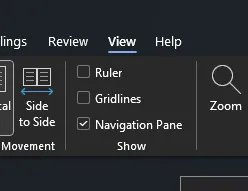
To enable Navigation Pane, go to View and check Navigation Pane on the toolbar.

Example:
- Heading 1: bold, centered.
- Heading 2: bold, left-aligned.
- Heading 3: regular, italic, 1cm indent.
- Heading 4: regular, italic, 1cm indent.
For Heading 1 and Heading 2, modify them the same way as Paragraph: right-click Heading 1 and Heading 2 on the Styles bar and select Modify.

What about Heading 3 and Heading 4 that don’t show on the Styles bar? Follow these steps to display all styles:
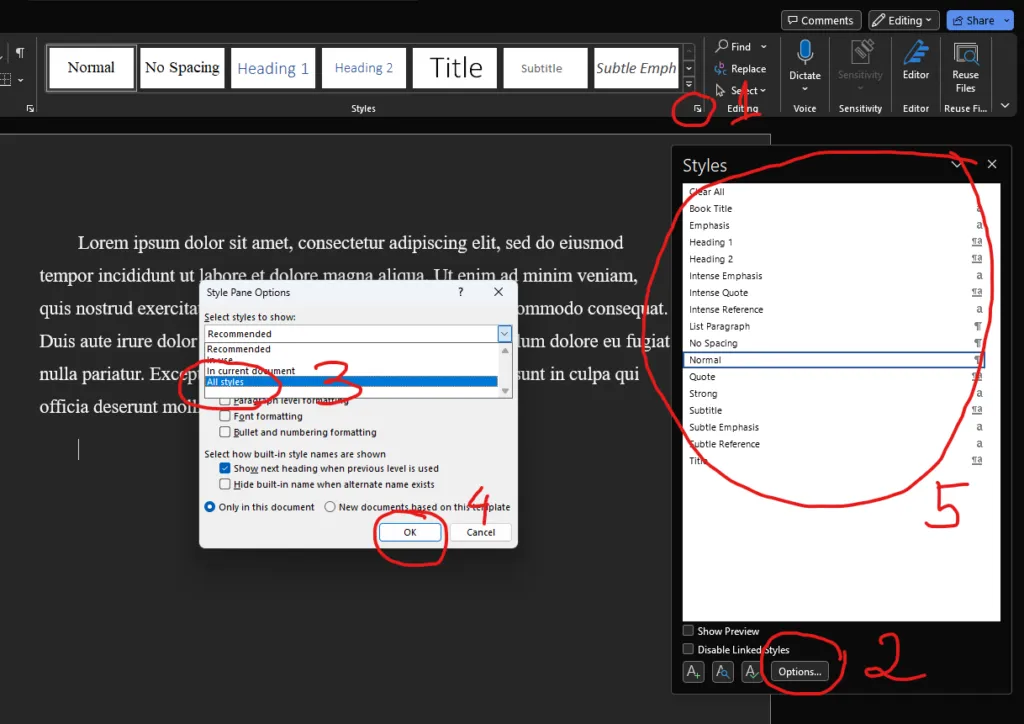
Tab Stop
Tab stop is the position the cursor jumps to when you press Tab. Depending on cursor position, pressing Tab moves to the nearest tab stop.
Set tab stops for any style by right-clicking the style and selecting Modify -> Format -> Tabs. Below is an example where each Tab press moves the cursor to positions 1cm, 2cm, 3cm, etc.
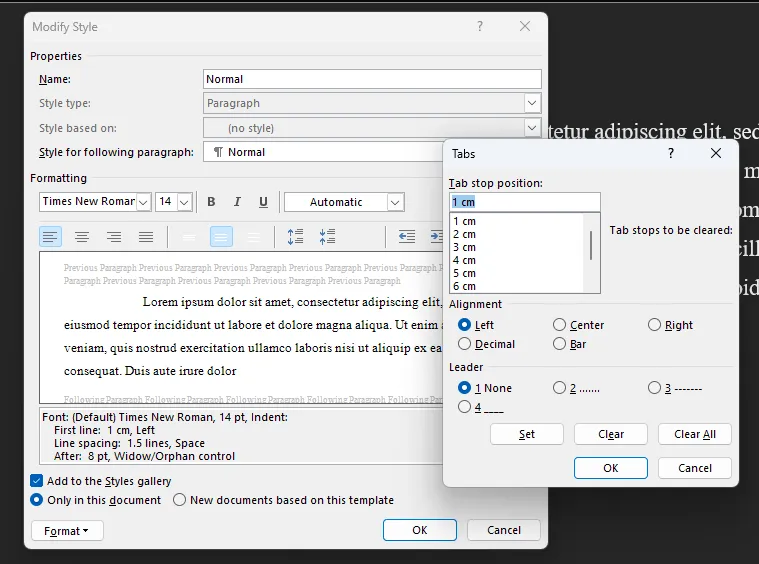
Result — when pressing Tab, the cursor moves to the configured tab stop positions:
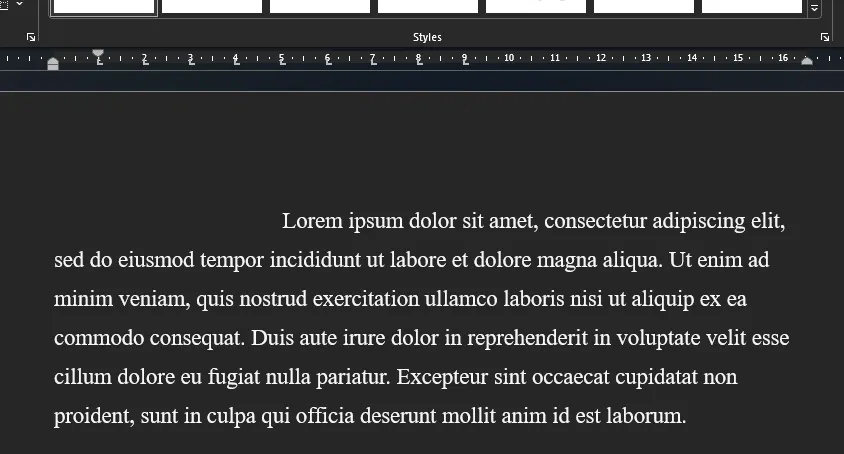
To display the ruler bar at the top, go to View -> check Ruler.
With units, margins, paragraph styles, headings, and tab stops configured, your Word file is ready for actual content. Part 2 covers auto-generated table of contents and page numbering — the things that save you the most time on a long report.