Your thesis is 80 pages long and you just realized the page numbers are wrong. Or worse, you added a new chapter and the table of contents doesn’t reflect it. Both problems are avoidable if you set up sections and auto-generated TOC correctly from the start.
Table of Contents
Open Table of Contents
Table of Figures
Table of figures (or more generally, table of models) is a list containing references to captions of a specific label type added at various positions in Word (examples of labels: “Figure” or “Table”).
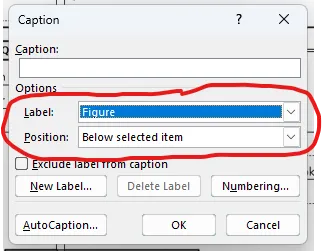
To add a caption for a figure/table, first select it. Then go to References -> Insert Caption.
In the Caption box, select the label. If the desired label doesn’t exist, add it via New Label below.
Position sets whether the caption appears above or below the image. You can also configure numbering via the Numbering button.
Result:
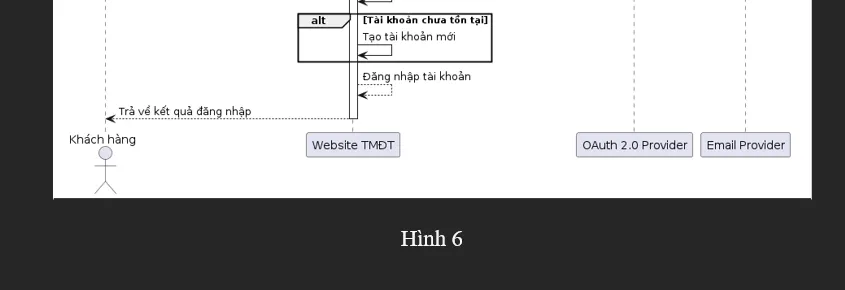
To write the title, just add a space and type (optionally add a separator like a colon before it).
Result (caption 2.5 is because I configured the current chapter number (chapter 2) into the caption numbering (figure 5) via the Numbering setup mentioned above):

After adding captions, next add the table of figures.
Move the cursor to the desired position, then go to References -> Insert Table of Figures. In the Table of Figures box, configure display options and click OK:
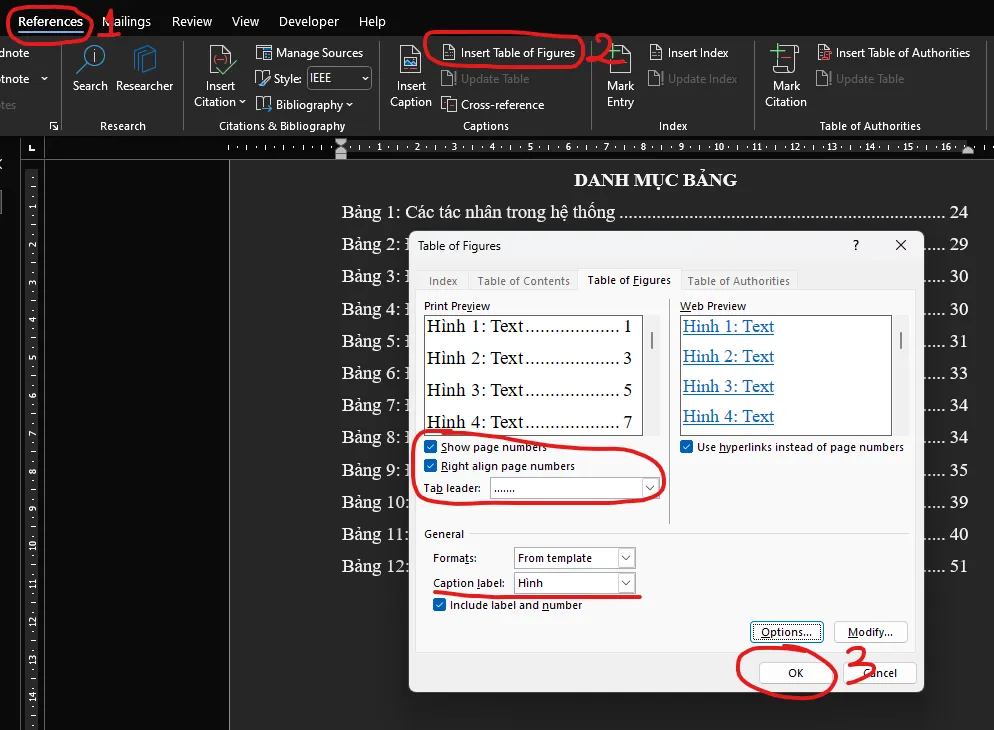
Result:

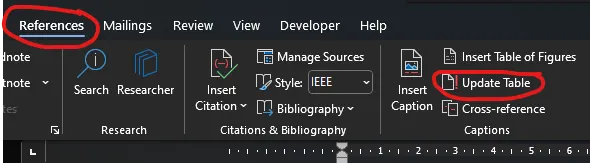
Like TOC, table of figures doesn’t auto-update on content changes. To update:
-
Click on the table of figures to update.
-
Go to References -> click Update Table.
Section
Besides dividing content by pages, Microsoft Word also supports dividing by Sections — an implicit division. Its purpose will be explained below. To create a new section, go to Layout -> Breaks -> Section Breaks and select Next Page.
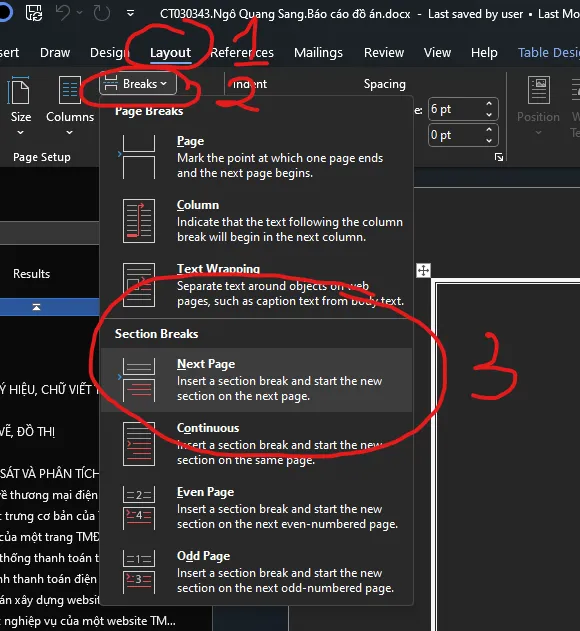
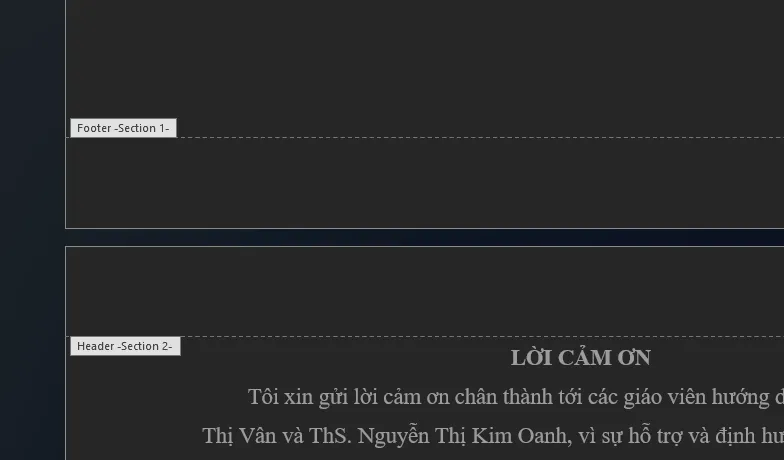
After inserting a section break at the cursor position, double-clicking the header/footer area of the page with the section break shows the next page has a different section number:
Page Number
To add page numbers in Word:
-
Double-click the footer area of any page.
-
A new tab Header & Footer appears in the top navigation. Select Page Number -> Bottom of Page and pick the display style. Done.
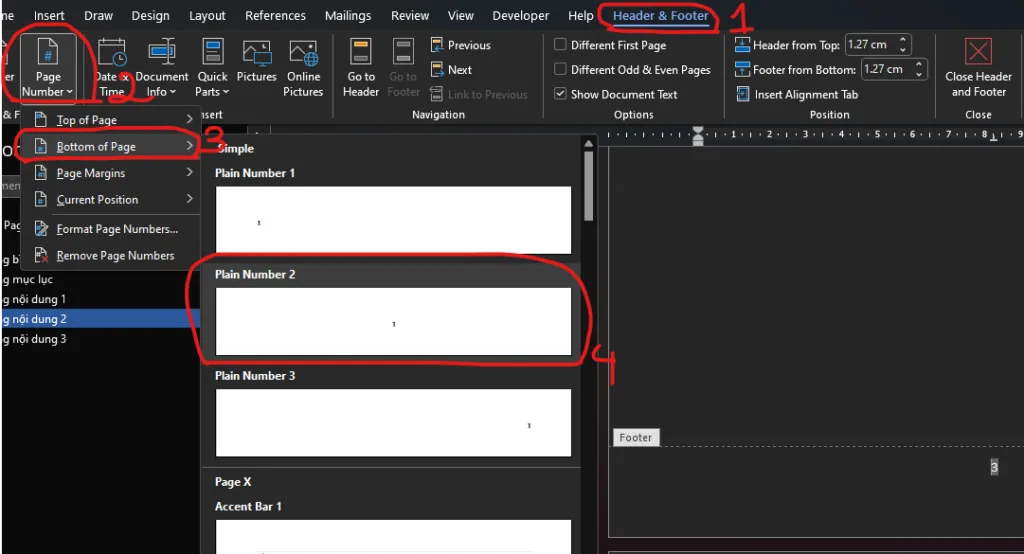
But what if you don’t want page numbers on the cover page?
To do this:
-
Separate the cover page and remaining content into 2 sections. Example: cover page in section 1, rest in section 2.
-
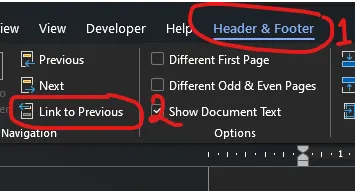
Double-click the footer of any page in section 2 and from the top navigation go to Header & Footer -> uncheck Link to Previous. This prevents section 2 pages from being affected by section 1 settings since we’ll remove the page number in section 1.
-
Next, add page numbers to section 2 as normal.
-
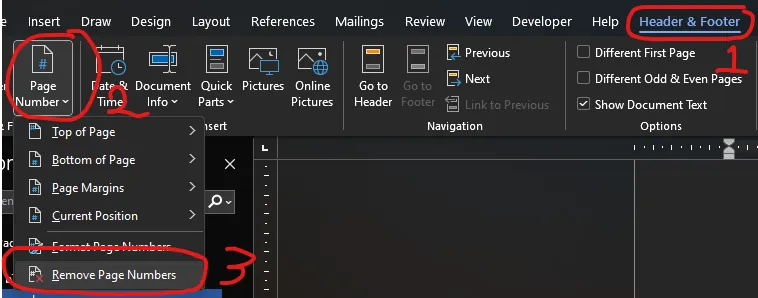
Remove page numbers from section 1 (if any) by double-clicking the footer of any page in section 1 and going to Header & Footer -> Page Number -> Remove Page Numbers.
Done — the cover page no longer has a page number. With auto-generated TOC, table of figures, and section-based page numbering set up, Part 3 covers small settings and shortcuts that make the actual writing faster.